Mount Rimwall was done on 2 separate days. The first day was August 1, 2015 with Chris and the second was August 3, 2015 with Curtis. For the sake of this entry, both days will be combined into one post.
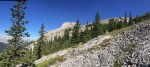
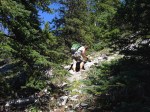
From the “parking lot”, the hike is a fairly easy walk through the forest. There are some steep sections but overall, it’s a walk in the park. There are three known trails (probably many more, but I could only find 3) up the mountain. For the first 20 minutes, you are following the Wind Tower trail. The first branch to Rimwall can be found at the 15 minute mark. There is some marking tape and the initials WT with an arrow carved into a tree. The path to the left goes up to Rimwall (steeply) and the path to the right goes to Wind Tower and other forks. If you would like some bushwacking, take the left fork and follow it.
Left Fork
From the fork, it is a steady and steep climb. I took this both days. Be warned, the trail is intermittent at best. This route will have you finding your own path for a good portion of the hike up to the rock outcrops. If you are uncomfortable with bushwacking and such, do not take this route. Keep going up and do not diverge right or left for about 45 minutes. When you reach the point where you can see a rock cliff to your left, head to the cliff. From there, you can climb up and you will be at the rock outcrops. If you go left too soon (as I did on August 3rd), you will end up losing what minimal trail markings and it will be more difficult to get your bearings. If you do lose the trail, head up the mountain towards the saddle area but be on the look out for cairns that will lead you back on the path.
Right Fork
If you take the right fork, you will end up going towards Wind Tower. A quick five or ten minutes on this trail and you will come across another fork marked by a curved tree. Taking this left will lead you almost vertical initially. This trail is best used going down due to the steepness of it all the way to the rock outcrops. The trail is marked with cairns so it will lead you up to the outcrops.
If you continue on the Wind Tower trail, you will encounter another fork. Taking the left will lead you up the ridge and to the saddle. I did not take this route so I cannot speak to what it entails.
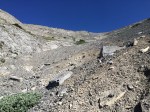
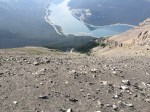
From the outcrops, it was a lot of slab rocks with loose pebbles on top. It made it a bit dangerous but you had to be aware of your footing. If you have good gripping hiking boots, you can easily walk on the slabs, making it much easier than traversing through boulders etc.
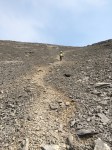
A short hike upwards and you get to the scree section. Follow the scree trail up until you come across the second patch of greenery (not counting the large one at the beginning of the scree). There is a faint trail off to the left; be sure to take it or try and slog through the scree up to the second fork. The first fork will set you on a traverse across the steep incline. Take your time and don’t rush as it is unstable in sections. Keep traversing and finding paths until you reach the cairn. From the cairn, it’s a moderate walk to the saddle.
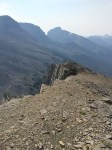
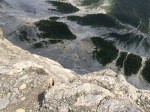
Once we got to the saddle, we decided to summit. The summit has 2 apparently paths, but only one looked safe. It cut across the back side of the mountain. The path was no bigger than one boot width, making it a bit difficult to walk on. There were lots of shale sections that looked like people had started to slide down (or larger rocks).
There were two rock bands that had to be scaled. The first one was a bit easier as it was nestled in a crevice. Footings were easy. Once up to the top, it was another easy walk to the second band. This climb was a bit harder as the path up was narrower and there wasn’t much to hold on to. After managing to climb up, it opens up to a desolate, post apocalyptic looking summit. The rocks were black like soil with reddish brown rocks littering the way. It was incredibly steep, but not impossible.
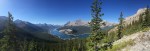
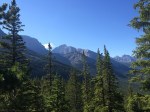
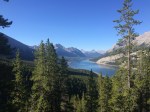
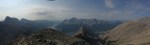
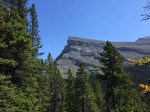
The views from the top were spectacular. You had an unobstructed view of the entire valley from the North side of Canmore all the way past Exshaw and to the other side, you could see all the way down the Spray Lakes corridor to Peter Lougheed Provincial Park.
The way down was simpler. We followed the cairns all the way to the main Wind Tower trail. From there it was a quick 15 minute walk back to the car.
Be sure to bring extra water to leave in your car to wash with. It can be very dusty on the trail and at the car.
In summary:
I would rate it as a moderate hike with steep sections that made it difficult at times. There was little to no scrambling, so I would rate it as an easy scramble (but if you are looking for a scramble, this is not a good one). This was completed in 5.5 hours from car to summit and back to car.
Here is my GPS, but the altitude is off. The hike is actually 8500 feet. I also forgot to start the recording at the car, so it’s from after 5 minutes of hiking. The line to the far left was us getting lost from the trail…